A kitchen mixer tap in Australia is a fundamental component of any kitchen, providing a convenient and efficient way to control the flow and temperature of water. Over time, however, these taps may start to leak, become outdated, or simply no longer suit your kitchen's aesthetic. Fortunately, replacing a kitchen mixer tap is a task that you can accomplish with a bit of patience and the right tools. In this article, we will guide you through the process of changing a kitchen mixer tap, empowering you to update your kitchen's look and functionality with ease.
Tools and Materials Needed: Before you begin, gather the following tools and materials:
1. New kitchen mixer tap
2. Adjustable wrench
3. Screwdriver (both flathead and Phillips)
4. Basin wrench (optional, but helpful)
5. Plumber's tape
6. Towels or rags
7. Bucket or bowl
8. Pen and paper (for note-taking)
Step-by-Step Guide:
Preparation and Safety First:
Begin by turning off the water supply to your kitchen tap. Locate the isolation valves beneath the sink and turn them clockwise until they are fully closed. In Australia these are located at the front on the house.
Place towels or rags under the sink to catch any water that may spill during the process.
Empty the cupboard beneath the sink to create ample space to work.
Remove the Existing Tap:
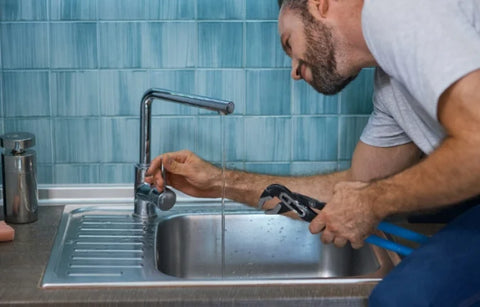
Locate the connection points between the tap and the water supply lines. These are usually visible beneath the sink.
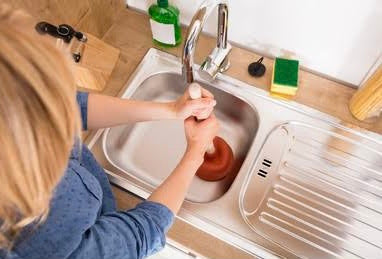
Use an adjustable wrench to loosen and disconnect the flexible hoses from the supply lines. Place a bucket or bowl underneath to catch any remaining water.
Next, use a screwdriver to remove the screws or nuts securing the tap to the sink or countertop.
Carefully lift the old tap away from the sink, ensuring you don't damage any surrounding surfaces.
Prepare the New Tap:
Before installing the new tap, read the manufacturer's instructions and familiarize yourself with the specific components and assembly process.
Apply plumber's tape to the threaded ends of the water supply lines. This helps create a watertight seal when connecting the new tap.
Install the New Tap:
Carefully position the new tap into the mounting holes on the sink or countertop.
Underneath the sink, secure the tap in place using the provided screws or nuts. Use a screwdriver or basin wrench to tighten them appropriately, ensuring stability.
Connect the flexible hoses to the water supply lines, ensuring a secure fit. Use an adjustable wrench to tighten the connections but avoid over-tightening, as it may damage the fittings.
Check for Leaks and Test:
Slowly turn on the water supply valves beneath the sink, allowing water to flow into the tap.
Observe the connections and surrounding areas for any signs of leakage. If you notice any leaks, tighten the affected connections or replace faulty parts as necessary.
Test the functionality of your new tap by adjusting the temperature and flow. Ensure both hot and cold water work correctly.
Finishing Touches:
Once you have confirmed that there are no leaks and the tap functions properly, clean up any remaining water and tidying up the work area.
Reinstall any items you removed from beneath the sink.
Conclusion: Replacing a kitchen mixer tap can breathe new life into your kitchen's aesthetics and functionality. By following this step-by-step guide, you can confidently tackle the task yourself, saving both time and money on hiring a professional plumber. Remember to exercise caution, pay attention to detail, and consult the manufacturer's instructions when necessary. With a little effort, you'll soon enjoy the benefits.